
Should you assemble PCBs manually or use automation? This comprehensive guide compares costs, quality, speed, and flexibility to help you choose the right approach for your production volume and requirements.
For more information on industry standards, see printed circuit board and IPC standards.
"When a cable sees more than 10,000 flex cycles, I stop treating jacket material as a purchasing detail; bend radius, strand class, and insulation thickness become the actual reliability drivers."
Hommer Zhao, Founder & CEO, WIRINGO
You've designed a circuit board. Now comes the question that can make or break your project economics: do you assemble it by hand or run it through automated machinery? The answer isn't as simple as "automation is always better." Each approach has its sweet spot, and choosing wrong costs you time, money, or both.
This guide breaks down when manual assembly makes sense, when automation is essential, and how to make the right call for your specific project.
Understanding the Two Approaches
Manual Assembly
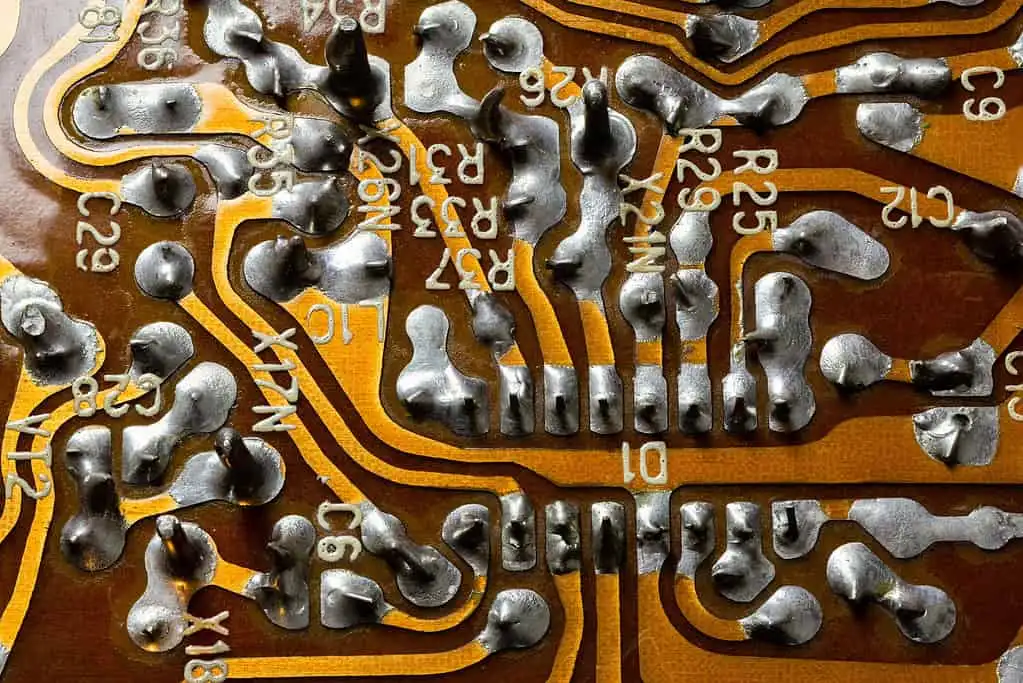
Manual assembly means human hands placing components and creating solder joints. A technician reads the assembly drawing, picks components from bins or reels, places them on the board, and solders them—either with a soldering iron or through a manual wave soldering process.
Despite sounding old-fashioned, manual assembly remains common and appropriate for many applications.
Automated Assembly
Automated assembly uses machines for most or all of the process. Solder paste printers apply precise paste deposits, pick-and-place machines position components at rates of thousands per hour, and reflow ovens create solder joints without human intervention.
Automated lines also include inspection systems—solder paste inspection (SPI), automated optical inspection (AOI), and X-ray inspection—that catch defects human eyes would miss.
Manual Assembly: Advantages and Limitations
When Manual Assembly Shines
Low Volume Production
For quantities under 50-100 units, manual assembly often costs less despite higher per-unit labor. Automated lines require programming, feeder setup, stencil fabrication, and test fixture development. These fixed costs spread over few units make automation expensive at low volumes.
A skilled technician can start assembling immediately with minimal setup. For a rush prototype, that time advantage matters more than placement speed.
Prototype and Development
Prototype runs need flexibility. Components change. Layouts evolve. Manual assembly adapts instantly—the technician simply places the new component. Automated lines require reprogramming, new feeders, and potentially new stencils for each change.
When you're iterating through design revisions weekly, manual assembly's flexibility outweighs automation's speed.
Non-Standard Components
Some components resist automation: odd-form parts without tape packaging, connectors requiring mechanical insertion force, heat-sensitive components needing special handling, or components with unusual orientations.
A skilled technician handles these naturally. Automating them requires specialized tooling that may not exist or costs more than the entire production run.
Repair and Rework
When boards come back for modification or repair, manual skills are essential. Replacing a failed component, adding a jumper wire, or modifying a production board requires human judgment and dexterity that machines can't provide.
Mixed Component Types
Boards combining standard SMT with unusual through-hole components or mechanical assemblies often need manual attention. The automated line handles the standard parts; technicians complete the rest.
Manual Assembly Limitations
Speed
A skilled technician places perhaps 50-100 components per hour depending on complexity. An entry-level pick-and-place machine handles 3,000-5,000 components per hour. High-end machines exceed 100,000 per hour.
For any volume where assembly time matters, automation wins decisively.
Consistency
Humans have bad days. They get tired, distracted, or rushed. Manual assembly error rates typically run 1-2% even with skilled technicians—not per component, but per board. In a complex assembly, that adds up.
Automated systems follow their programming exactly, every time. Process capability studies show defect rates measured in parts per million, not percent.
Fine Pitch and Miniature Components
0402 (1.0mm × 0.5mm) components push the limits of manual placement. 0201 (0.6mm × 0.3mm) components are essentially impossible to place by hand. BGAs with hundreds of pins underneath can't be manually soldered.
Modern electronics trend smaller constantly. Manual assembly increasingly can't handle current designs.
Repeatability
Every manually assembled board is slightly different. Solder joint quality varies. Component placement isn't identical. For applications requiring exact repeatability, this variation is unacceptable.
Automated Assembly: Advantages and Limitations
When Automation Excels
High Volume Production
Once volumes exceed a few hundred units, automation's economics become compelling. Setup costs spread over thousands of units become negligible per unit. Labor costs drop to machine operation and quality oversight.
At production volumes of thousands or millions, automation isn't optional—it's the only viable approach.
Consistency and Quality
Medical devices. Automotive systems. Aerospace electronics. Any application where defects cause serious consequences needs automation's consistency. A pick-and-place machine places the millionth component with the same precision as the first.
Statistical process control becomes meaningful when the process itself is controlled. Automation enables the quality levels modern standards demand.
Fine Pitch Components
BGAs, QFNs, micro-BGAs, 01005 passives—modern IC packages assume automated assembly. Their pitch is too fine, their leads too hidden, their tolerances too tight for manual handling.
If your design uses current semiconductor packages, automation isn't a choice.
Speed Requirements
When customers need product now, automation delivers. A well-tuned SMT line assembles complete boards in minutes. The bottleneck shifts to testing, not assembly.
Automation Limitations
Setup Costs
"A crimp that passes pull-force once is not enough. For production harnesses, the process has to hold conductor brush length, insulation support, and crimp height within the work instruction every shift."
Hommer Zhao, Founder & CEO, WIRINGO
Stencils cost hundreds of dollars. Programming takes hours. Feeder setup requires component verification. Test fixtures need development. These costs hurt at low volumes.
For a ten-unit prototype run, automated setup might cost more than manual assembly for the entire batch.
Inflexibility
Changing a component on an automated line means reprogramming, possibly new feeders, maybe a new stencil. What takes a technician thirty seconds takes an engineer an hour.
Rapid design iteration fights automation's structured nature.
Capital Investment
A basic SMT line—printer, pick-and-place, reflow oven, AOI—costs several hundred thousand dollars minimum. High-speed lines reach millions. This investment requires volume to justify.
Contract manufacturers amortize equipment across many customers. In-house automation only makes sense at significant production levels.
Component Packaging Requirements
Automated placement requires components on tape-and-reel, in tubes, or in trays with precise specifications. Loose components from grab bags don't work. Neither do non-standard packaging formats.
Some specialty components simply aren't available in automation-compatible packaging.
Hybrid Approaches: The Best of Both Worlds
Most real-world production combines manual and automated methods.
Typical Hybrid Flow
- Automated SMT: High-speed placement of standard surface mount components
- Reflow soldering: Creating SMT solder joints automatically
- Manual through-hole: Inserting connectors, transformers, and mechanical components
- Wave or selective soldering: Soldering through-hole joints
- Manual final assembly: Adding mechanical parts, labels, and packaging
This approach captures automation's speed and consistency for suitable components while accepting manual handling for components that need it.
Progressive Automation
Many companies start with manual assembly and automate progressively:
- Phase 1: Manual assembly of everything
- Phase 2: Contract out SMT, manual through-hole in-house
- Phase 3: In-house pick-and-place for common components
- Phase 4: Full SMT line with selective soldering
This progression matches investment to actual production needs.
Decision Framework: Choosing Your Approach
Volume Analysis
| Annual Volume | Typical Approach |
|---|---|
| Under 100 units | Manual or hybrid |
| 100-500 units | Hybrid, possibly contract SMT |
| 500-5,000 units | Contract manufacturing |
| Over 5,000 units | Dedicated automation |
These are rough guidelines—component complexity, product value, and quality requirements shift the boundaries.
Component Complexity Assessment
Evaluate your bill of materials:
- Automation-required: BGAs, QFNs, 0201 passives, fine-pitch QFPs
- Automation-preferred: Standard SMT (0603, 0805, SOIC, SOT-23)
- Flexible: Larger SMT, simple through-hole
- Manual-preferred: Connectors, transformers, mechanical assemblies
If automation-required components dominate, automation is mandatory regardless of volume. If manual-preferred components dominate, even higher volumes may use significant manual labor.
Cost Modeling
Compare total costs honestly:
Manual costs:
- Labor hours × fully burdened rate
- Training and supervision
- Rework rate × rework cost
- Quality inspection time
Automation costs:
- Equipment depreciation or contract assembly fees
- Setup and programming (NRE)
- Stencil fabrication
- Feeder and fixture costs
- Maintenance and operation
Run the numbers for your specific situation. Assumptions about labor rates, volumes, and complexity dramatically affect the answer.
Quality Requirements
Consider your quality standards:
- Consumer products may accept manual assembly defect rates
- Industrial equipment typically needs automation's consistency
- Medical and aerospace applications require documented, controlled processes that effectively mandate automation
Regulatory requirements often push toward automation through traceability and process control requirements.
Common Mistakes to Avoid
Automating Too Early
Investing in equipment for uncertain volumes risks expensive idle capacity. Contract manufacturing offers flexibility until volumes stabilize.
Staying Manual Too Long
Conversely, some companies resist automation past the point of reason. When quality suffers, deliveries slip, or costs spiral, it's time to invest.
Ignoring the Hybrid Path
Pure manual or pure automation rarely optimizes costs. Most products benefit from selective automation—automate what makes sense, keep manual what doesn't.
Underestimating Setup Costs
Automation's per-unit costs look attractive. But NRE, programming, fixtures, and learning curve costs add up. Include everything when comparing.
Overestimating Manual Quality
Skilled technicians do good work, but human consistency has limits. Don't assume manual assembly produces higher quality than automation—usually the opposite is true.
The Bottom Line
Manual and automated assembly serve different needs. Manual suits low volumes, prototypes, unusual components, and repair work. Automation handles high volumes, miniature components, and consistency-critical applications.
Most products use both approaches at different life cycle stages or for different component types. The key is matching method to requirement without ideology—use what works for your specific situation.
When in doubt, run the numbers. Cost modeling with honest assumptions usually reveals the right path. And remember that contract manufacturers offer access to automation without capital investment—often the best choice for emerging products with uncertain volumes.
"On portable cord and harness work, the standard matters as much as the drawing. UL 62, IPC/WHMA-A-620, and the connector maker's crimp spec each control a different failure mode."
Hommer Zhao, Founder & CEO, WIRINGO
If you want to turn this topic into a production decision, review our cable assembly guide, check the supporting numbers on the FFC cable reference, and use the wire harness manufacturing service if you need a second review before release.
FAQ
What bend radius should I use for flexible cable design?
For dynamic flex, many teams start around 10x to 20x the overall cable thickness, while static bend-to-install applications can tolerate tighter radii if the supplier approves the construction.
Which standard applies to wire harness workmanship?
IPC/WHMA-A-620 is the core acceptance document, and many customers also add UL, SAE, or connector-specific crimp specifications depending on the market.
How do I know whether a cable needs shielding?
If the line carries fast edges, switching currents, or operates near motors and inverters, shielding should be evaluated. A 360-degree termination usually performs better than a pigtail drain at higher frequencies.
What pull-force numbers matter on a crimped wire?
The exact value depends on conductor size and terminal series, but the production rule is simple: use the terminal maker's crimp-height window and verify pull-force with a calibrated tester.
When is FPC better than FFC?
FPC is usually the safer choice when the design needs controlled impedance, tighter than about 0.5 mm pitch features, dynamic flex life, or integrated components on the cable itself.
How much temperature margin should portable cord have?
For real industrial use, choose a cord whose jacket and insulation ratings exceed the worst-case environment, whether that means 60°C, 90°C, or oil- and water-resistant service under UL 62 or NEC Article 400.
Need Help with Your PCB Design?
Check out our free calculators and tools for electronics engineers.
Browse PCB Tools"In over 20 years of manufacturing experience, we have learned that quality control at the component level determines 80% of field reliability. Every specification decision you make today affects warranty costs three years from now."
— Hommer Zhao, Founder & CEO, WIRINGO